All guides
SES.HOSPEDAJES
SES.HOSPEDAJES: how to find your lessor code, establishment code and web service username and password
Step-by-step guide with screenshots to find the four details your check-in software needs inside the SES.HOSPEDAJES portal: lessor code, establishment code and the web service credentials.
Updated on 25 July 2026

If you have already registered with SES.HOSPEDAJES but can’t find the details your check-in software asks for to submit traveller reports through the web service, this guide is for you. Follow the steps below to get all four:
- Lessor code (código de arrendador)
- Establishment code (código de establecimiento)
- Web service username
- Web service password
All four arrive by email when the Ministry approves your registration, but it’s very common not to find those emails months later. Don’t worry: every one of them can be looked up (and the password reset) from the portal itself. If you haven’t registered yet, start with our complete SES.HOSPEDAJES guide and come back once your registration is approved.
Before you start, be clear on what each code is, because they are often mixed up:
- The lessor code identifies the person or company responsible. There is one per account: if you manage several properties, they all share the same one.
- The establishment code identifies each property. There is a different one for every registered accommodation.
Both are up to 10 digits long, so double-check which one you paste into each field. And note: neither of them is the registry receipt (REGAGE…) the electronic office gives you when you file the form — that number is not a valid code.
Step 1: open the portal
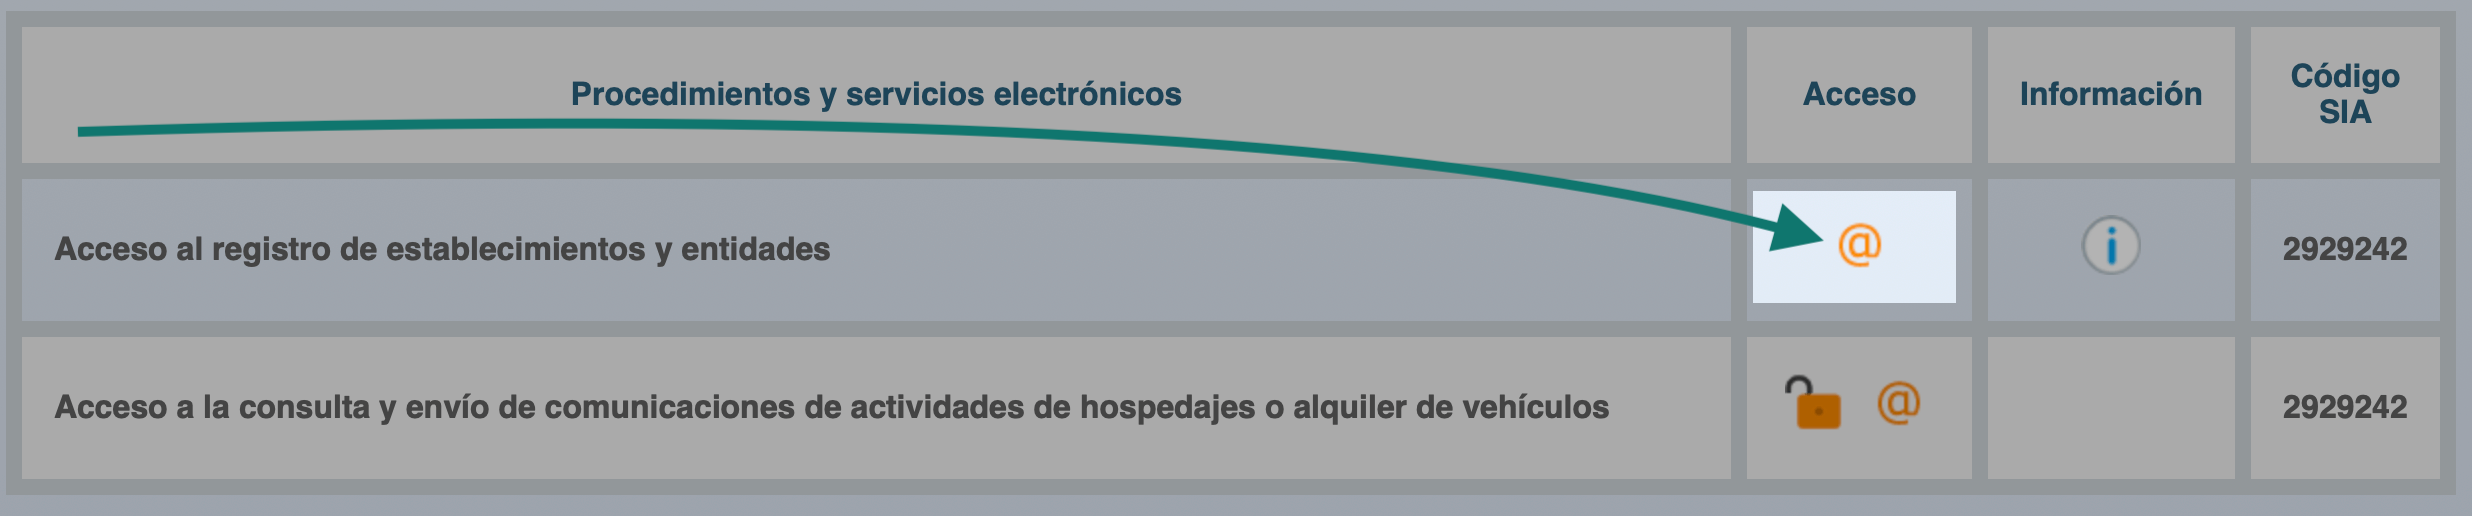
Go to the Ministry of Interior electronic office, section Hospedajes y alquiler de vehículos, and click the @ icon on Acceso al registro de establecimientos y entidades (access to the establishments and entities registry).
Step 2: identify yourself
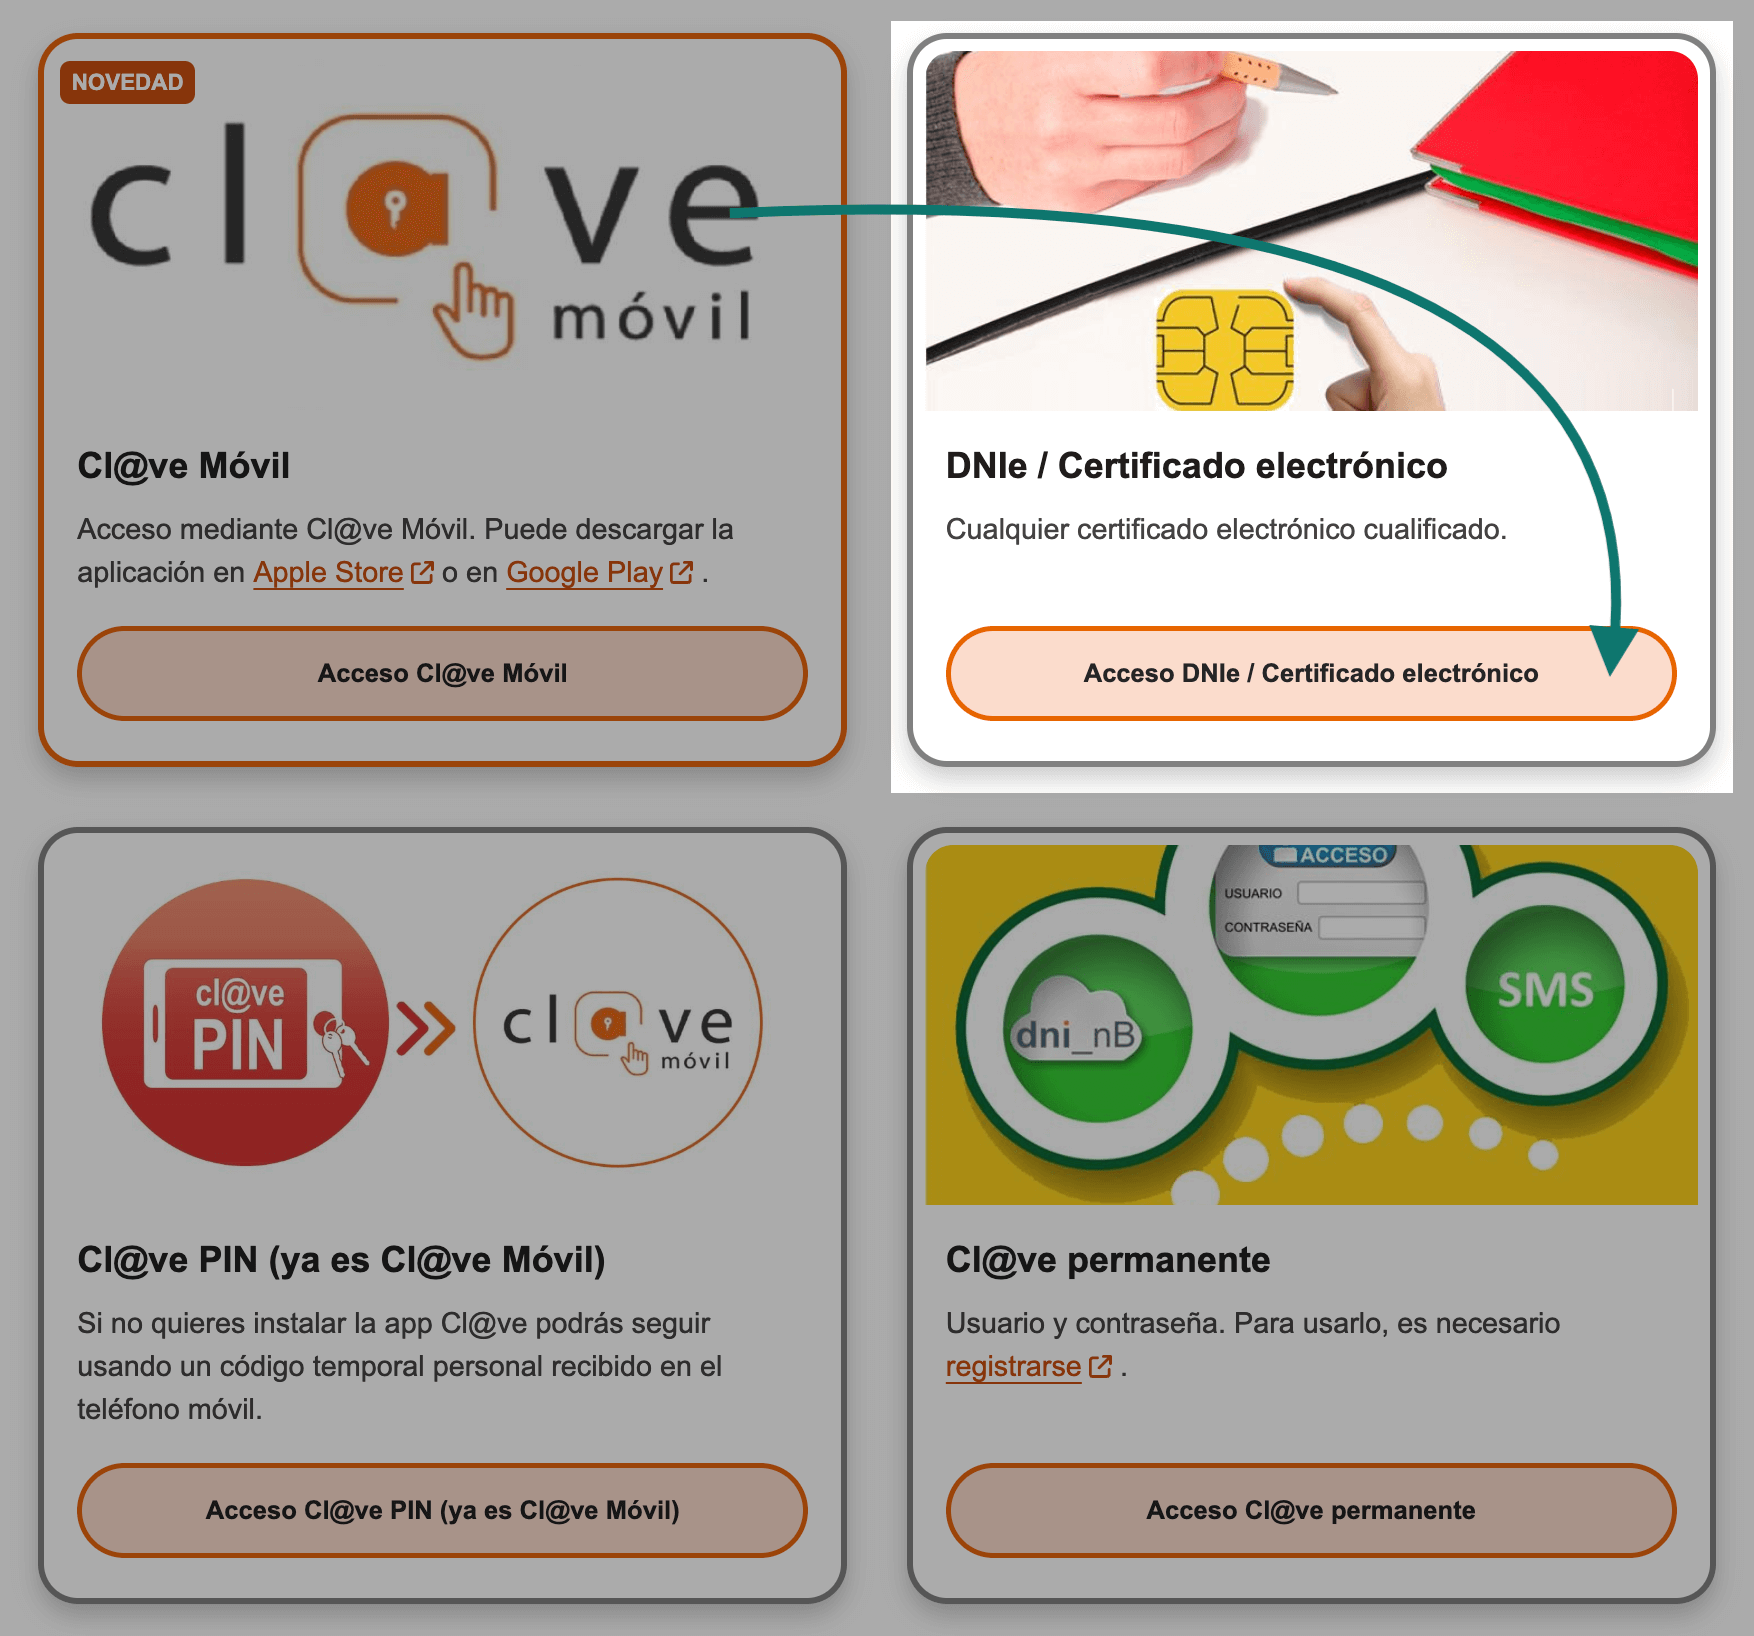
Choose your identification method. We recommend DNIe / electronic certificate; Cl@ve Móvil or Cl@ve permanente also work.
Step 3: open “Servicio de comunicación”
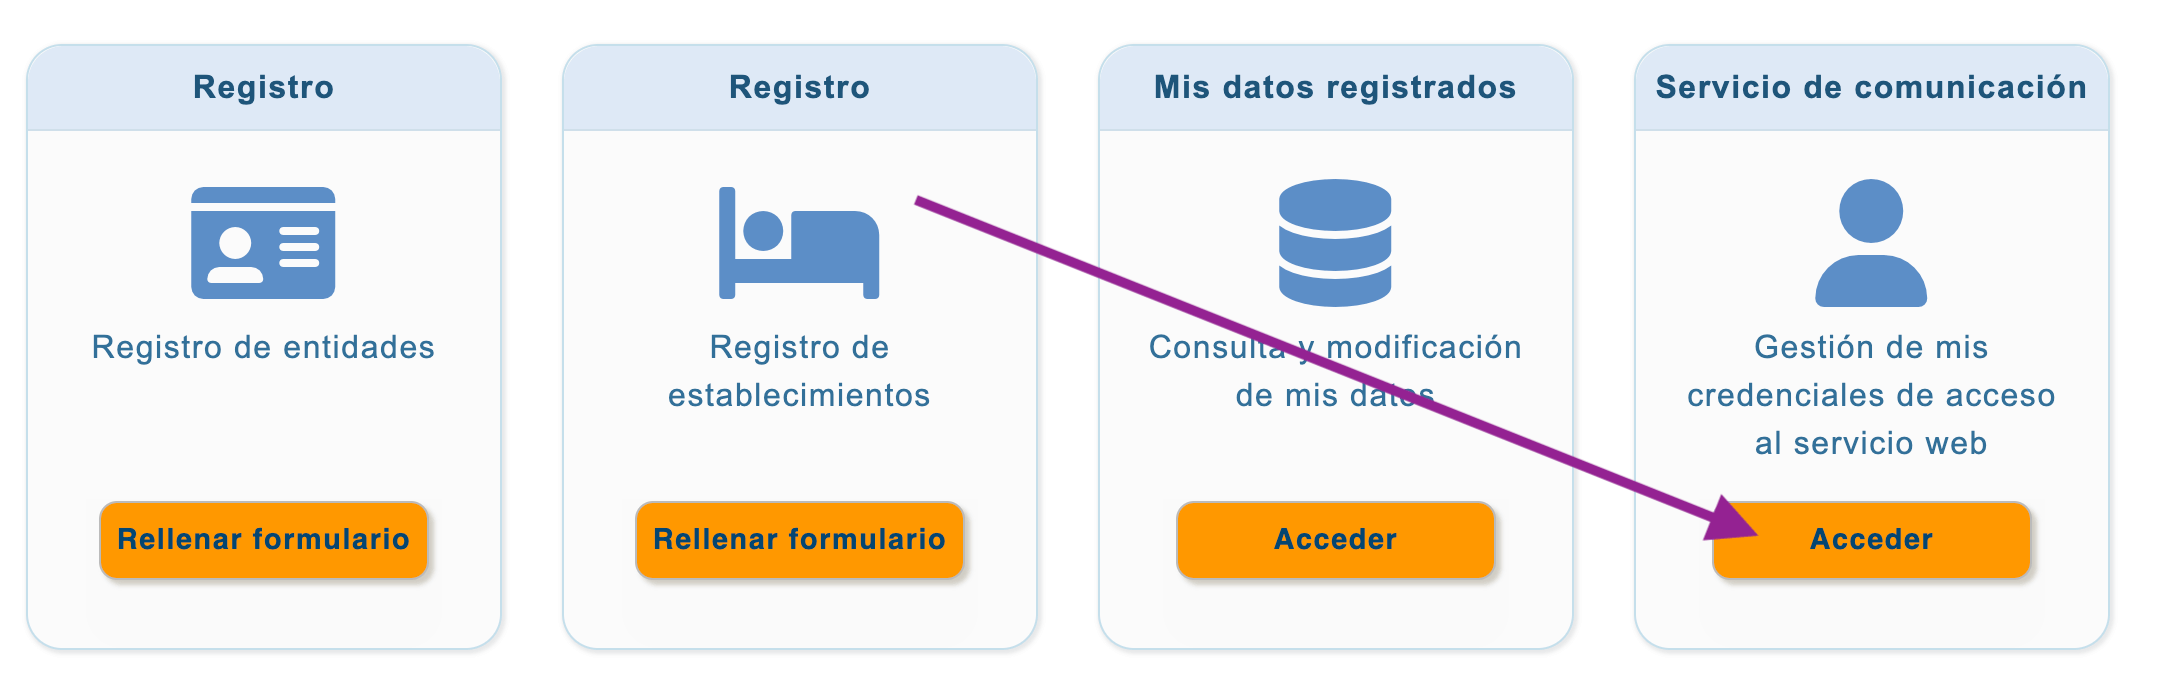
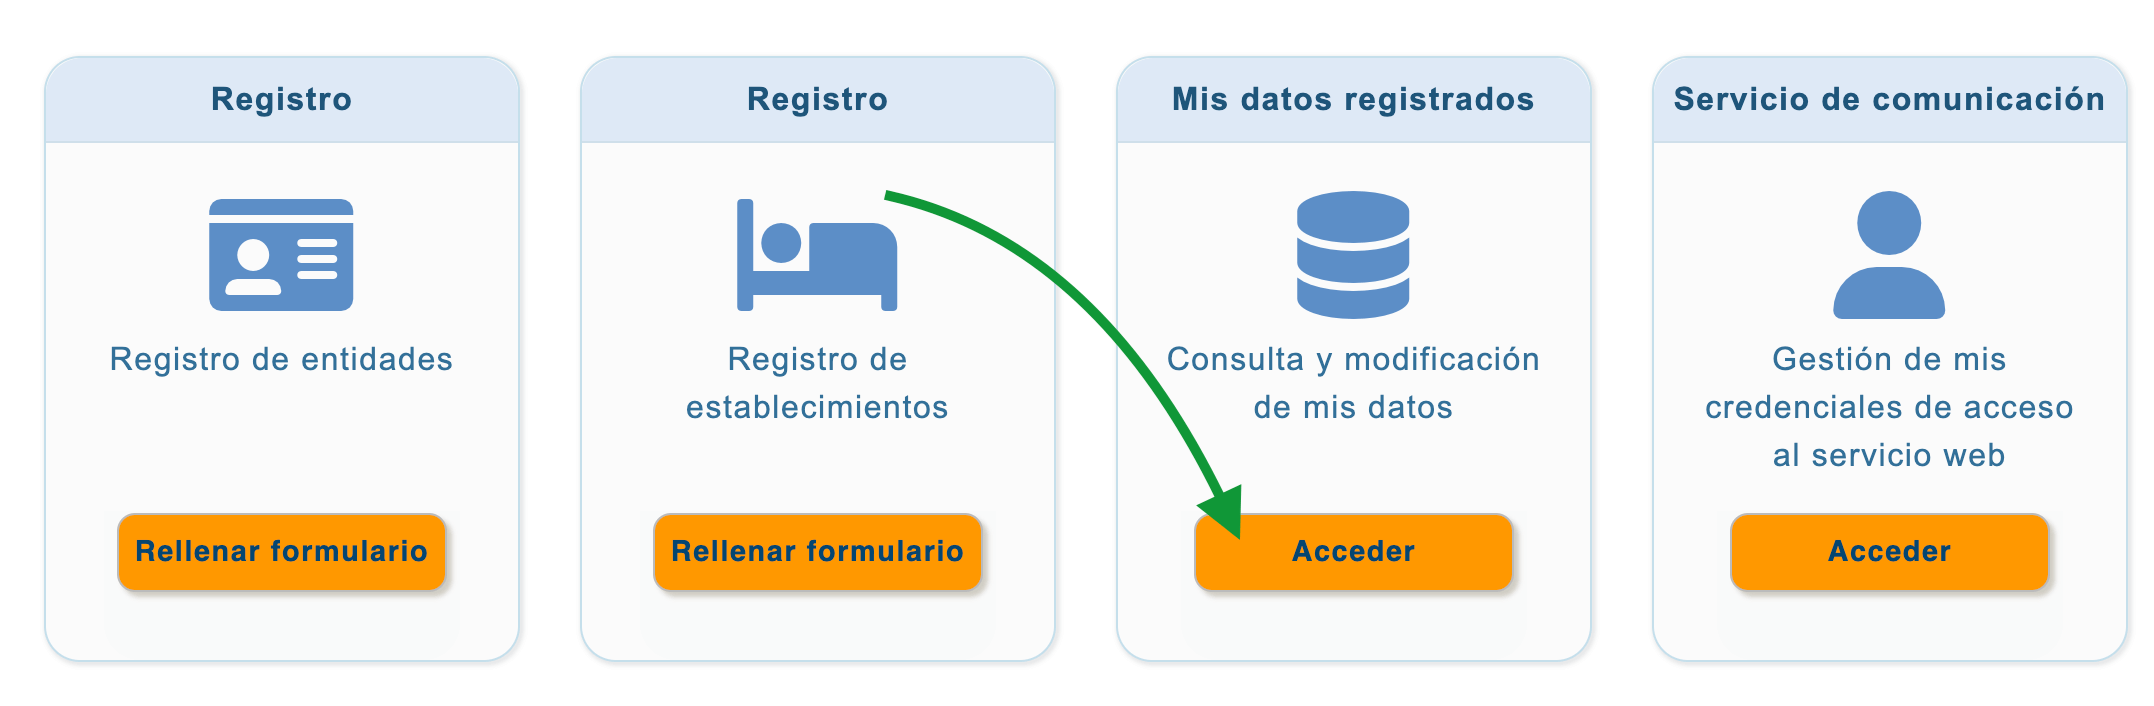
The home screen shows four cards. Click Acceder on the Servicio de comunicación card (“management of my web service access credentials”).
Step 4: copy your web service username
Your web service username is shown at the top, in the Usuario field (for example, A12345678WS). Copy it exactly as displayed, suffix included.
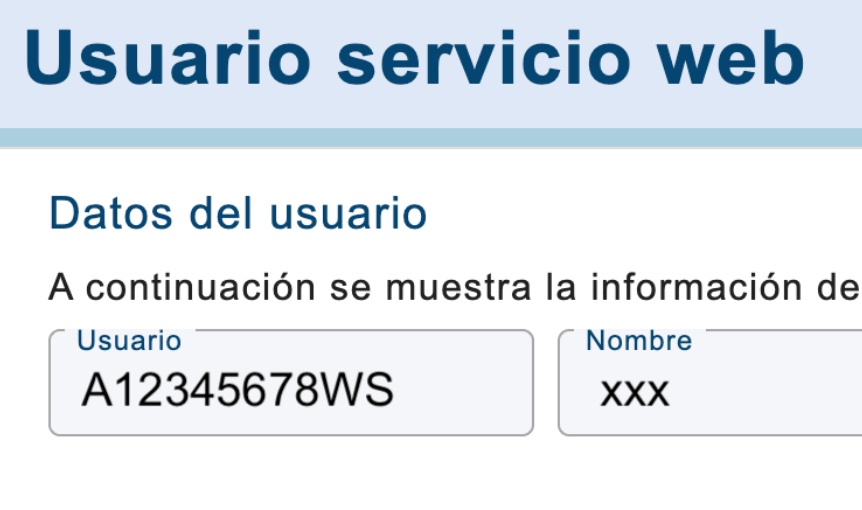
This username is not the one you use to sign in to the portal with your certificate: it’s a technical credential meant to be used by your check-in software.
Step 5: set the web service password
The web service password can’t be viewed, but it can be reset. On that same screen, click Cambiar contraseña, type the new password twice and click Guardar. It must be at least 8 characters long, with an uppercase letter, a lowercase letter and a number.
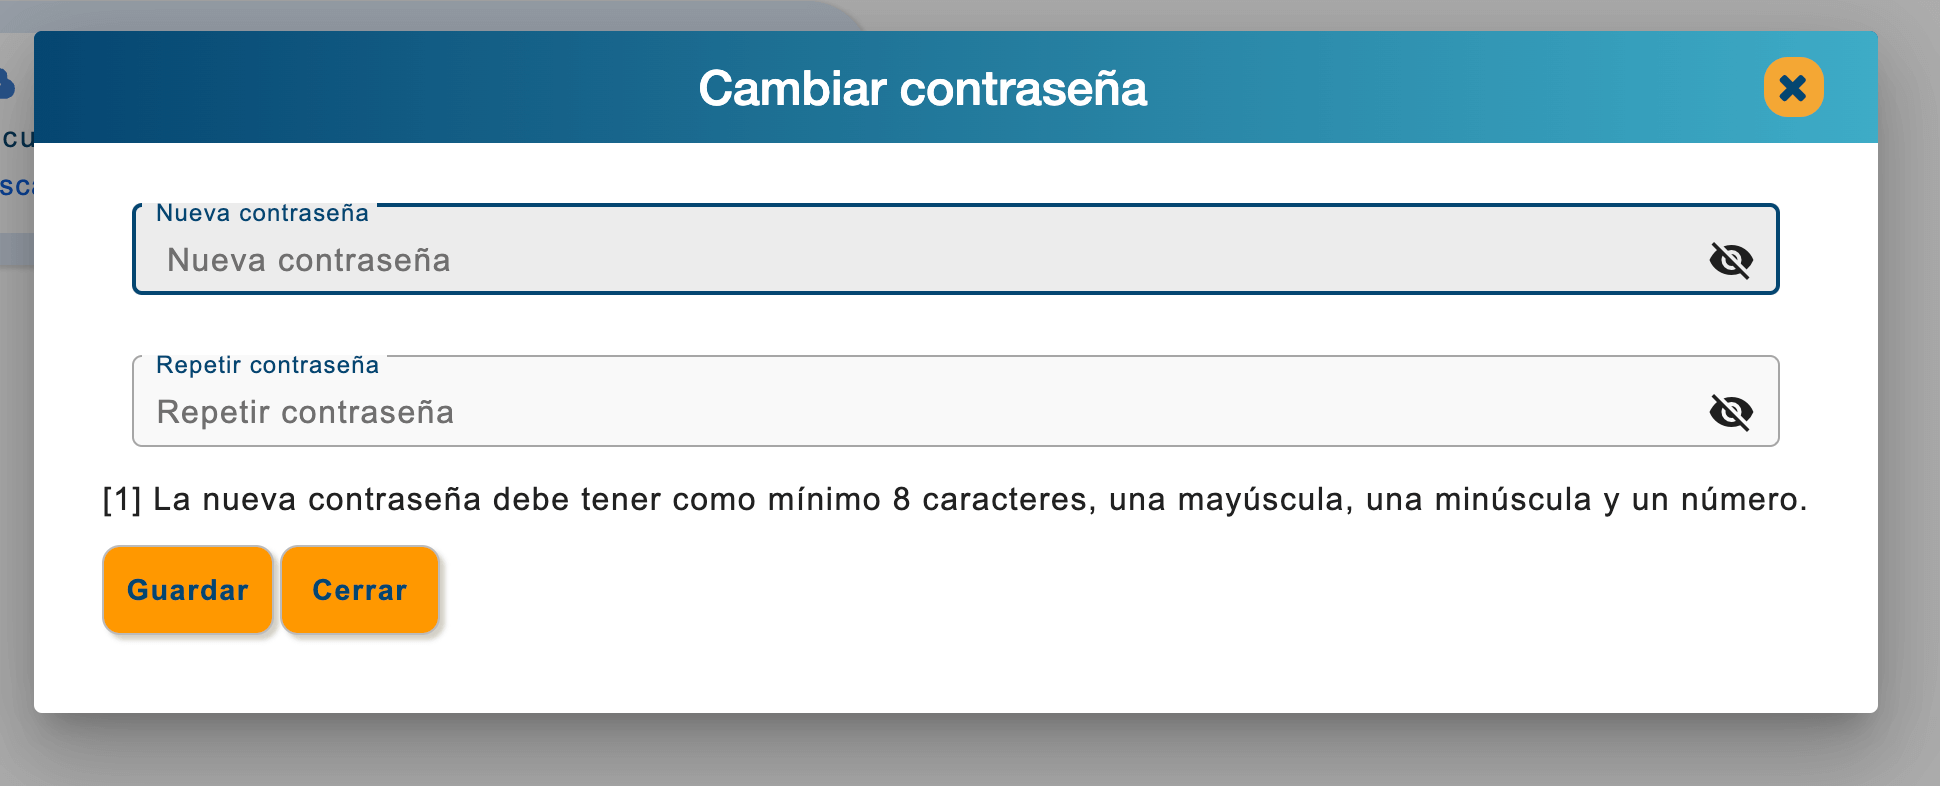
Store it somewhere safe: it’s the one you’ll enter in your check-in software. If automatic submissions were already set up with the previous password, remember to update it there too.
Step 6: go back to the home screen
Click Inicio in the top bar to return to the four-card home screen.
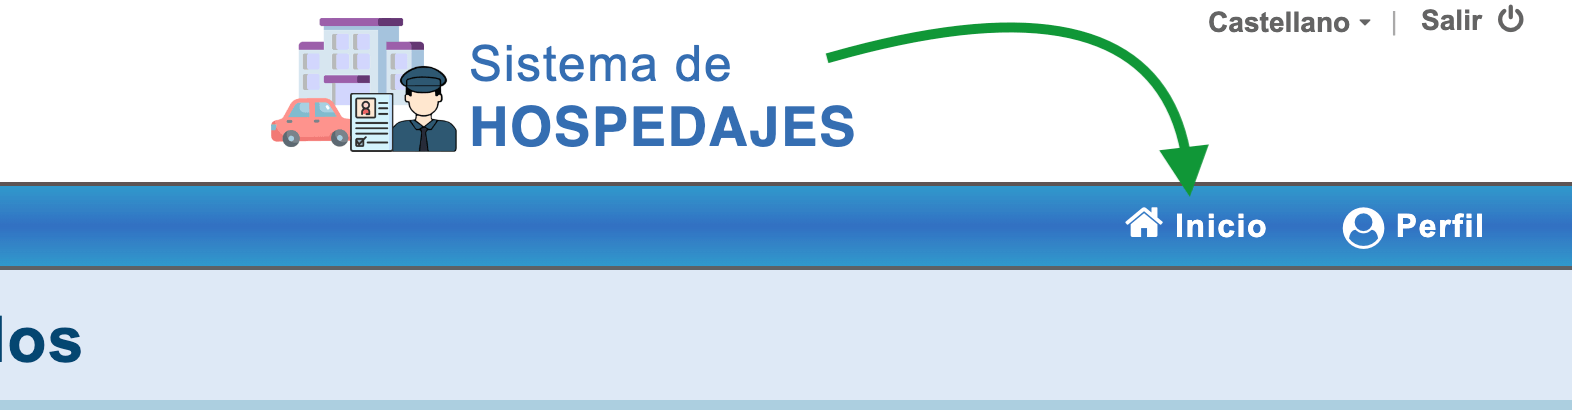
Step 7: open “Mis datos registrados”
Now click Acceder on the Mis datos registrados card (“view and update my data”).
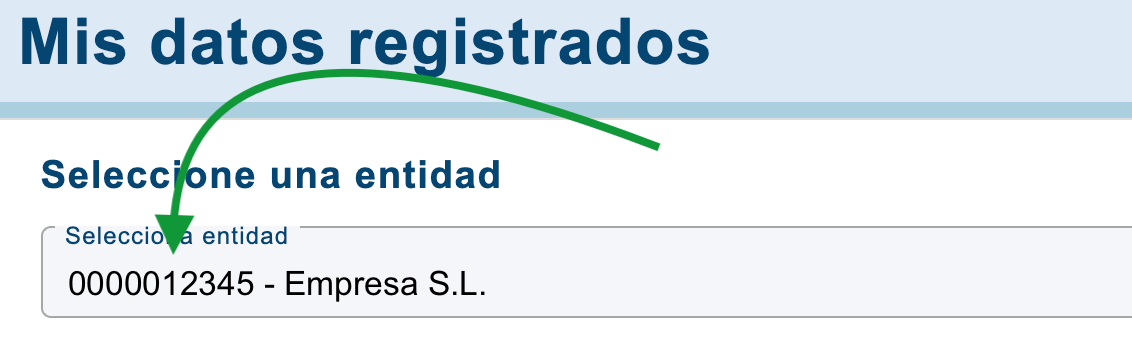
Step 8: find your lessor code
Your lessor code appears in front of your entity name in the Seleccione entidad dropdown (for example, 0000012345 - Empresa S.L.). The code is the numeric part, without the name.
Step 9: find each establishment code
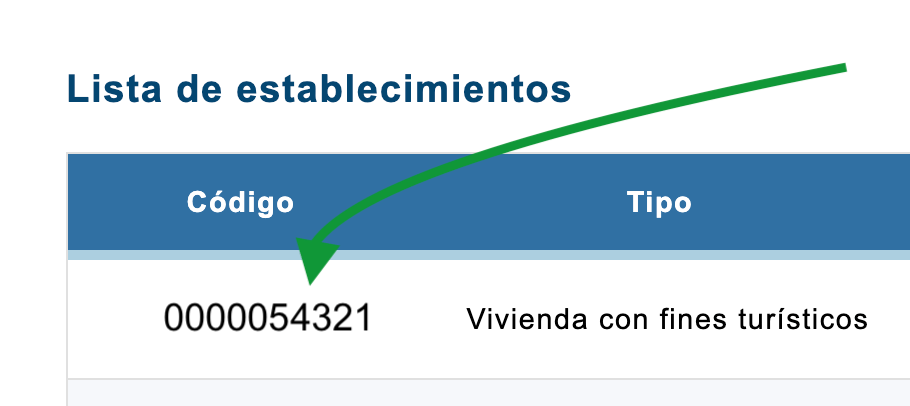
On the same page, a bit further down, the Lista de establecimientos section lists each of your properties preceded by its establishment code. If you manage several, copy each property’s code separately.
Where to enter these details in HazCheckin
With the four details at hand, open your HazCheckin dashboard, go to your property and open Legal information. Paste the lessor code, the establishment code and the web service username and password there. From that moment on, every traveller report is submitted automatically, on time, without typing anything into the portal.
Frequently asked questions
Are the lessor code and the establishment code the same thing?
No. The lessor code identifies your account (one for all your properties); the establishment code identifies each property (one per accommodation). Both are up to 10 digits, which is why they get mixed up.
Can I use the REGAGE receipt as my establishment code?
No. The registry receipt (it starts with REGAGE and is 20 characters long) only proves you filed the form at the electronic office. The establishment code is the number of up to 10 digits shown in the Lista de establecimientos.
Is the web service username the same one I use to sign in to the portal?
No. You sign in to the portal with your digital certificate or Cl@ve. The web service username (with the WS suffix) and its password are separate technical credentials, meant to be used by software on your behalf.
I changed the web service password — anything else?
Yes: update it in your check-in software. If HazCheckin submits your reports, open your property’s Legal information and save the new password; submissions keep working with no further changes.
No establishment shows up in the list — what now?
It means the establishment registration was never completed or is still being processed. Review the registration procedure in our complete SES.HOSPEDAJES guide or contact the Ministry’s support from the electronic office.